What are You Looking for?
Search
Crypto
Editorial
Tech
Elijah Lucas
Elijah is a professional blogger who writes about technologies and health to inspire their target audience.
34 posts
By
Elijah Lucas
May 14, 2025
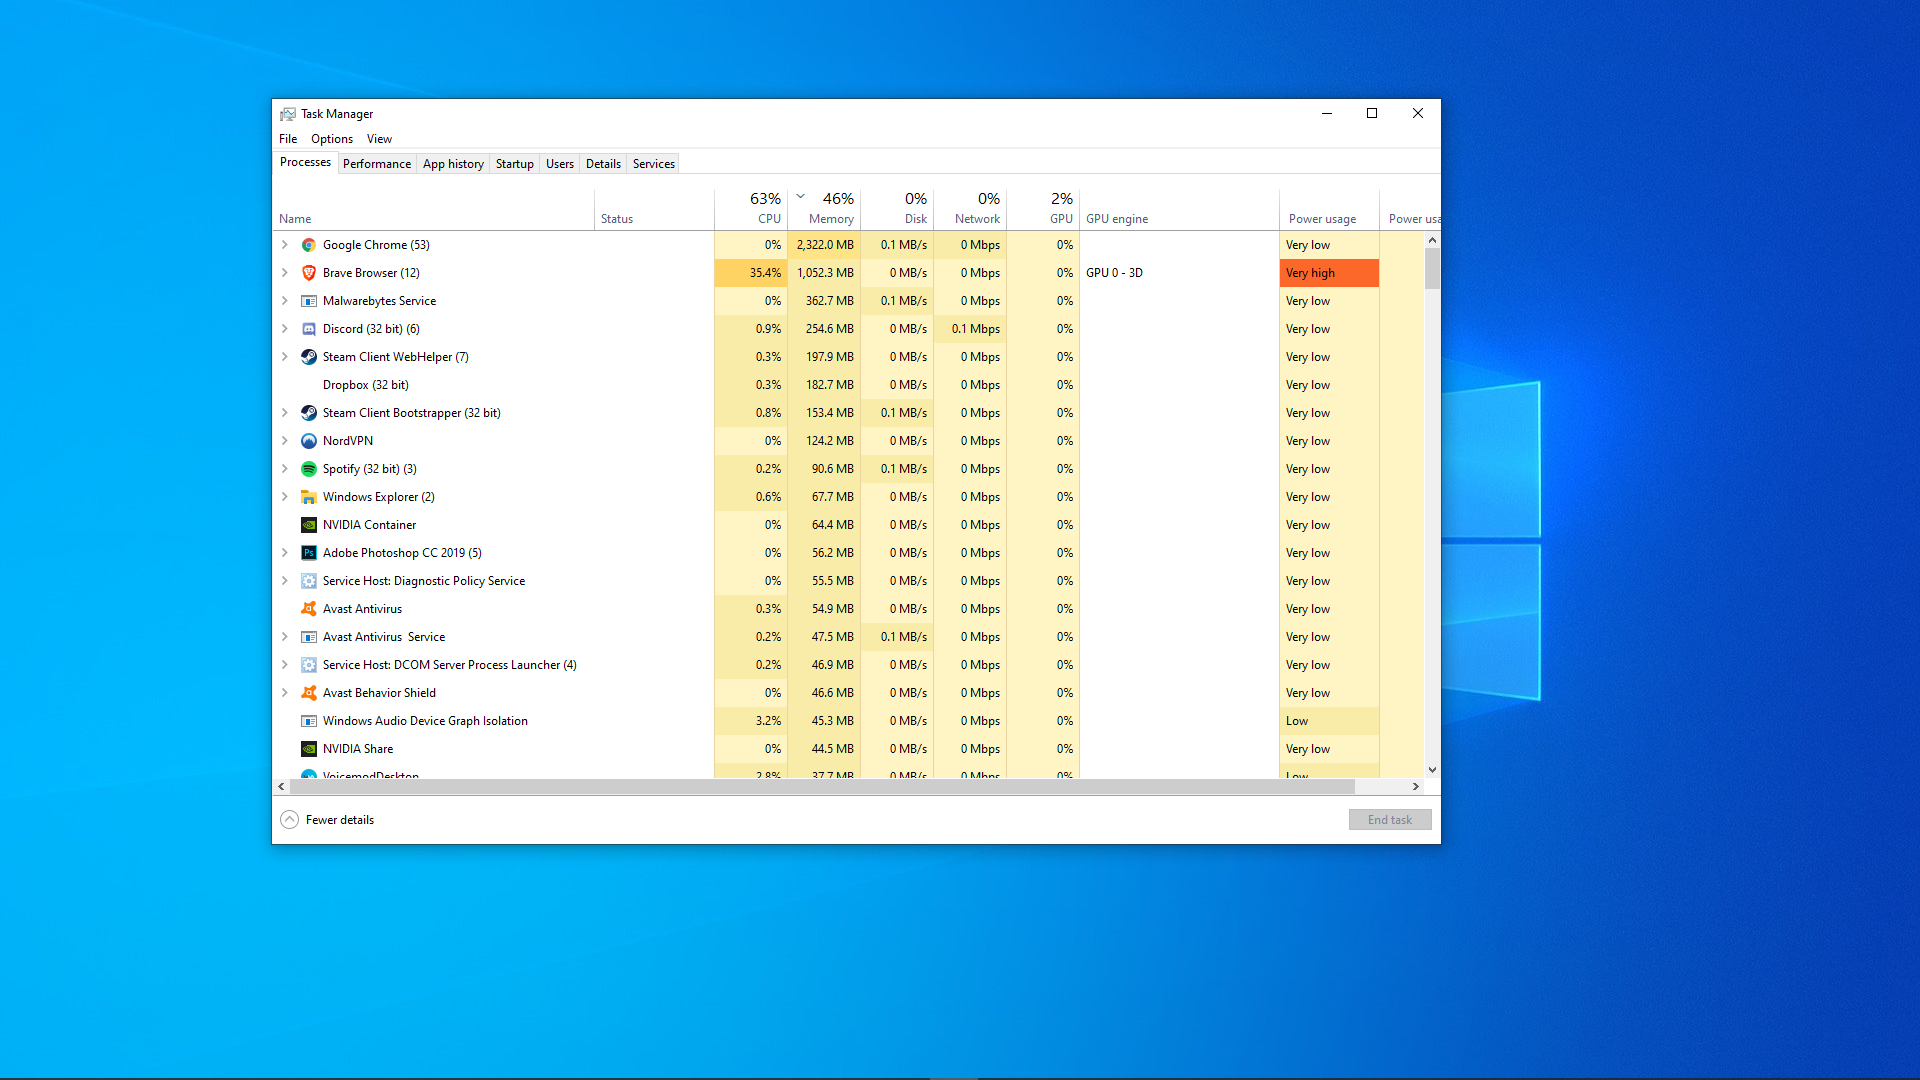
How to Disable Startup Programs in Windows Task Manager
Uncategorized
By
Elijah Lucas
May 13, 2025
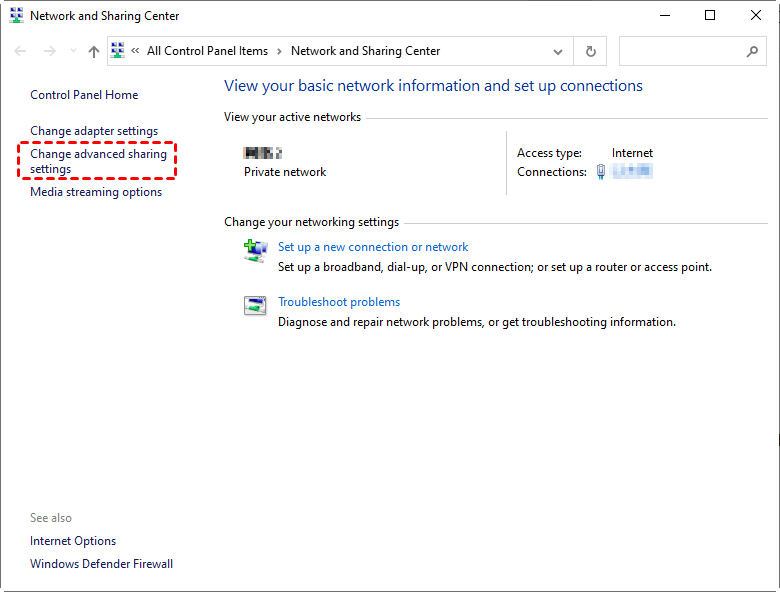
How to Share Files Between Windows PCs on Same Network
Uncategorized
By
Elijah Lucas
May 9, 2025
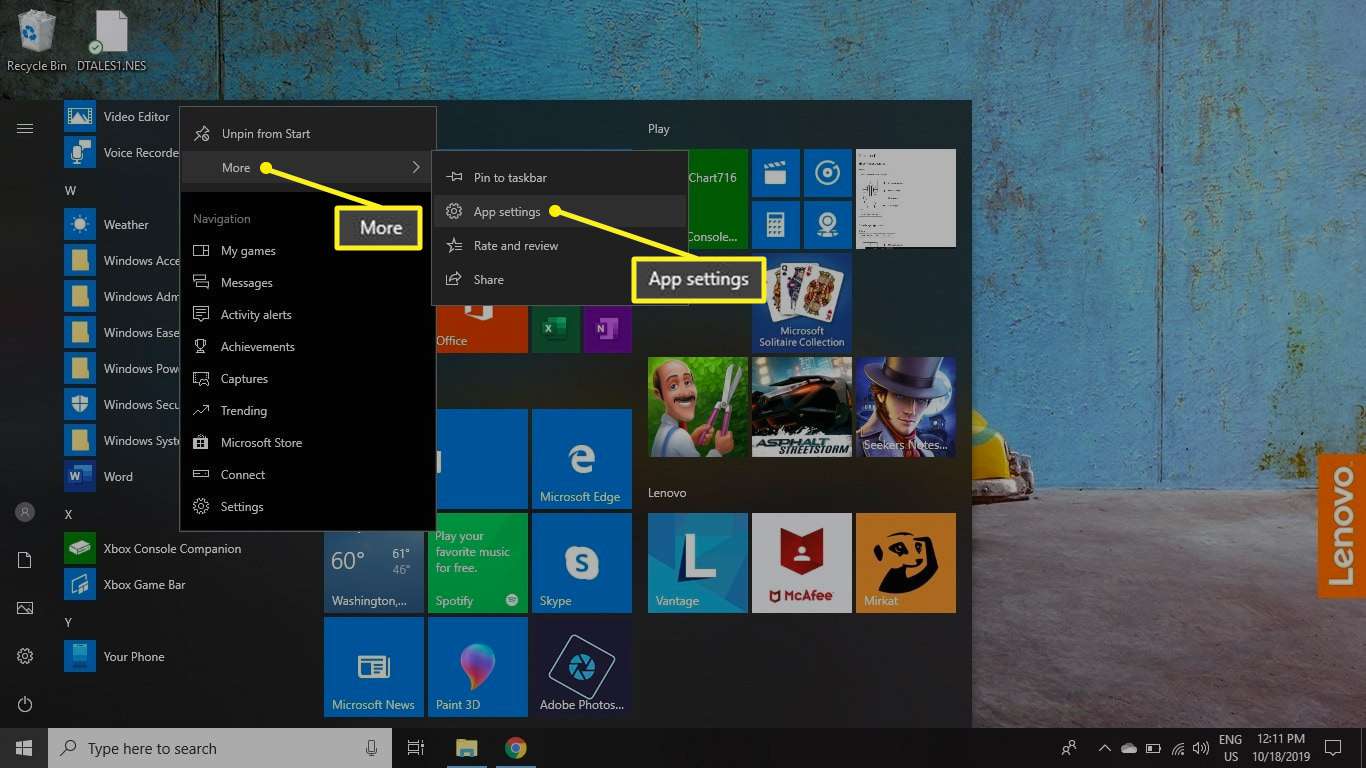
How to Manage App Permissions in Windows settings
Uncategorized
By
Elijah Lucas
May 8, 2025
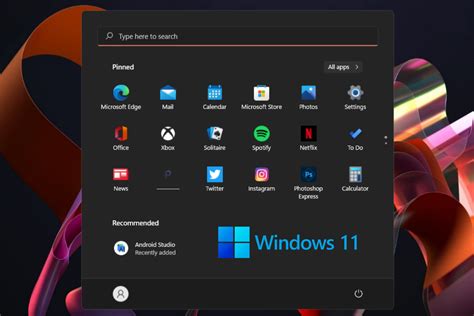
How to Customize Taskbar and Start Menu in Windows 11
Uncategorized
By
Elijah Lucas
May 6, 2025
How to Enhance Productivity with AI tools on Windows 10
Editorial
By
Elijah Lucas
April 25, 2025
How to Install Artificial Intelligence Tools on Windows 11
Tech
By
Elijah Lucas
April 17, 2025
How to Use ChatGPT for Content Creation
Editorial
By
Elijah Lucas
April 16, 2025
How to Build an AI Chatbot for Customer Support
Editorial
By
Elijah Lucas
April 3, 2025
How to integrate AI into a mobile app
Editorial
By
Elijah Lucas
April 2, 2025
How to use AI for data analysis and insights
Editorial