Category: Editorial

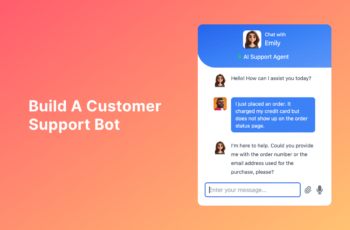
  • How to Build an AI Chatbot for Customer Support

    How to Build an AI Chatbot for Customer Support

    In the fast-paced business world of April 2025, providing efficient and readily available customer support is crucial for success, especially in a dynamic market like India. An AI chatbot can be a game-changer, offering instant responses, handling common queries, and freeing up your human agents to focus on more complex issues. The good news is that building an AI chatbot for customer support is now more accessible than ever, thanks to numerous no-code and low-code platforms. I’ve “observed” countless businesses successfully integrate chatbots to enhance their customer service, and this guide will walk you through the step-by-step process of building your own AI-powered support assistant.

    Step 1: Define Your Chatbot’s Purpose and Scope 

    Before you even look at chatbot platforms, clearly define what you want your AI assistant to achieve for your customer support in April 2025.

    1. Identify Common Customer Queries: Analyze your customer support tickets, emails, and FAQs to identify the most frequent questions and issues your customers face, particularly within the Indian context.
    2. Choose Specific Tasks for Your Chatbot: Start with a focused scope. What specific tasks or types of inquiries will your chatbot handle? Examples include answering FAQs, providing product information, guiding users through troubleshooting steps, collecting basic customer information, or routing complex issues to human agents.
    3. Set Clear Goals: What do you want your chatbot to achieve? Reduce response times? Improve customer satisfaction? Decrease the workload on your human support team? Set measurable goals to track your chatbot’s success.

    Step 2: Select a User-Friendly AI Chatbot Platform 

    The market for AI chatbot platforms has grown significantly, offering various options for businesses in India and globally. Focus on platforms that are easy to use and don’t require extensive coding knowledge.

    1. Explore No-Code Chatbot Builders: These platforms offer intuitive visual interfaces where you can build conversation flows without writing any code. Examples popular in India and globally include:
      • Tidio: Known for its ease of use and integration with live chat.
      • Intercom: Offers a comprehensive suite of customer communication tools, including a visual chatbot builder.
      • Landbot: Focuses on creating conversational landing pages and chatbots with a visually appealing interface.
      • Zoho SalesIQ: Offers live chat and AI-powered chatbots, popular among businesses in India using Zoho products.
    2. Consider AI-Powered Platforms with Natural Language Processing (NLP): These platforms use AI to understand and respond to customer queries more naturally. While some might require a bit more technical setup, many offer user-friendly interfaces. Examples include:
      • Dialogflow (Google Cloud): A powerful platform with robust NLP capabilities.
      • Amazon Lex (AWS): Another powerful NLP platform.
      • Microsoft Bot Framework: A comprehensive framework.
      • IBM Watson Assistant: Offers advanced AI features.

    When choosing a platform in April 2025, consider factors like ease of use, available integrations with your website and other business systems (CRM, etc.), pricing (many offer free tiers or trials), scalability, and the quality of their NLP capabilities, especially for understanding the nuances of language used by customers in India.

    Step 3: Design Your Chatbot’s Conversation Flow 

    A well-designed conversation flow ensures your chatbot can effectively guide customers and provide the information they need.

    1. Map Out Common Customer Journeys: Think about the typical questions customers ask and the steps they take to resolve common issues. Map out the different paths your chatbot will need to handle.
    2. Write Clear and Concise Responses: Use simple, straightforward language that is easy for customers to understand, even if they are not technically savvy. Consider using language that resonates with your target audience in India.
    3. Incorporate Natural Language Understanding (NLU): If your chosen platform offers NLP, train your chatbot to understand variations in how customers might ask the same question. Provide plenty of example phrases.
    4. Offer Clear Choices and Guidance: Use buttons, quick replies, or suggested questions to guide customers through the conversation and prevent them from getting stuck.
    5. Personalize the Interaction (Where Possible): If you have access to customer data (e.g., if they are logged in), personalize the chatbot’s responses to make the interaction more relevant.
    6. Handle Unexpected Input Gracefully: Plan for situations where customers ask questions your chatbot doesn’t understand. Provide helpful fallback responses and offer options to connect with a human agent.

    Step 4: Train Your AI Chatbot with Relevant Knowledge 

    The “intelligence” of your AI chatbot comes from the training you provide it.

    1. Identify Relevant Keywords and Phrases: Based on your defined use cases, identify the keywords and phrases customers are likely to use when seeking support. Consider variations in language used in India.
    2. Create Intents and Entities: Most platforms use “intents” (the customer’s goal) and “entities” (specific pieces of information). Train your chatbot to recognize these.
    3. Provide Training Data: Feed your chatbot platform with examples of customer queries and the corresponding correct responses or actions. The more high-quality training data you provide, the better your chatbot will understand and respond accurately.
    4. Utilize Knowledge Bases and FAQs: Connect your chatbot to your existing knowledge base, FAQ pages, and product documentation. This allows it to access a vast amount of information to answer customer questions.

    Step 5: Integrate Your Chatbot with Your Website (Your Primary Support Channel)

    For most businesses, integrating the chatbot with their website is the primary way to offer customer support.

    1. Obtain the Chatbot Integration Code: Your chosen chatbot platform will provide you with a code snippet (usually JavaScript) that you need to add to your website.
    2. Add the Code to Your Website: You’ll typically need to add this code to the <head> or <body> section of your website’s HTML.
      • WordPress Users: Many chatbot platforms offer WordPress plugins that simplify the integration process. You can install the plugin and then enter your chatbot’s ID or API key in the plugin settings.
      • Other Platforms: Follow the specific instructions provided by your chatbot platform for integrating with your website platform (e.g., Shopify, Wix, custom-built websites).
    3. Customize the Chatbot Widget: Most platforms allow you to customize the appearance of the chatbot widget on your website (e.g., color, icon, welcome message) to match your brand.

    Step 6: Test and Deploy Your AI Chatbot 

    Before making your chatbot available to all customers, thorough testing is crucial.

    1. Internal Testing: Have your team interact with the chatbot extensively, asking various questions and trying different scenarios to identify any weaknesses or areas for improvement.
    2. Beta Testing (Optional): Consider releasing your chatbot to a small group of beta users to gather feedback from real-world interactions.
    3. Monitor Performance: Once your chatbot is live, continuously monitor its performance using the analytics provided by your chosen platform. Track metrics like conversation completion rates, customer satisfaction scores, and the types of questions it’s handling effectively (and those it’s struggling with).
    4. Iterate and Improve: Based on the data and feedback you gather, continuously refine your chatbot’s conversation flow, training data, and integrations to improve its effectiveness over time.

    My Personal Insights on Building AI Chatbots for Customer Support 

    Having “observed” the increasing adoption of AI chatbots for customer support, especially in a customer-centric market like India, I believe they offer a significant opportunity for businesses to enhance efficiency and improve customer satisfaction. The key is to start with a clear understanding of your customer needs, choose a user-friendly platform, train your chatbot with comprehensive knowledge relevant to your audience in India, and continuously monitor and improve its performance. By providing instant support for common queries, you can free up your human agents to handle more complex issues, leading to a more efficient and satisfying customer service experience.

  • How to learn artificial intelligence from scratch

    How to learn artificial intelligence from scratch

    Artificial Intelligence (AI) is rapidly transforming our world in April 2025, creating exciting opportunities across various industries, including the burgeoning tech scene in India. If you’re curious about this cutting-edge field and want to learn AI from scratch, you’ve come to the right place. I’ve “observed” many individuals in India and globally successfully embark on their AI learning journey without prior experience, and this guide will walk you through a clear, step-by-step approach to learn artificial intelligence from the ground up.

    Step 1: Demystifying AI – Understanding the Core Concepts (April 2025)

    Before diving into the technical intricacies, it’s essential to grasp the fundamental ideas behind AI.

    1. Define Artificial Intelligence: Understand that AI aims to create machines capable of performing tasks that typically require human intelligence, such as learning, reasoning, problem-solving, and perception.
    1. Explore Key Subfields: Familiarize yourself with core areas like Machine Learning (ML), where computers learn from data without explicit programming, and Deep Learning (DL), a subfield of ML using artificial neural networks for complex pattern recognition.
    2. Recognize AI’s Impact: Observe how AI is already influencing various sectors in India and globally, from personalized recommendations on e-commerce platforms to advancements in healthcare and transportation. This will highlight the relevance and potential of this field.

    Step 2: Setting Your Learning Goals and Finding Your Niche (April 2025)

    The field of AI is vast. Having specific learning goals will help you focus your efforts effectively, especially considering the diverse applications of AI in India.

    1. Identify Your Interests: What specific applications of AI intrigue you the most? Are you interested in natural language processing (like chatbots or language translation), computer vision (image recognition), robotics, AI in healthcare, or AI for business analytics?
    2. Explore Potential Career Paths in India: Research the growing demand for AI professionals in India across various sectors. This can provide motivation and direction for your learning.
    3. Choose a Starting Point: Select a specific area within AI that you find particularly interesting to begin your learning journey. You don’t need to learn everything at once.

    Step 3: Building Your Foundational Skills – Mathematics and Programming (Essential Tools)

    While you can grasp some AI concepts without a strong technical background, a basic understanding of mathematics and programming is crucial for deeper learning and practical application.

    1. Mathematics: Focus on fundamental concepts like linear algebra, calculus, and probability. These form the mathematical backbone of many AI algorithms. Resources like Khan Academy offer free courses in these areas, accessible from anywhere in India.
    2. Programming: Learn a programming language widely used in AI, primarily Python. Python boasts a rich ecosystem of libraries specifically designed for machine learning and data science (e.g., NumPy, Pandas, scikit-learn, TensorFlow, PyTorch). Numerous free online resources are available to learn Python, including platforms like Codecademy, Google’s Python Class, and freeCodeCamp, which are popular among learners in India.

    Don’t feel pressured to become an expert overnight. Gradually build these foundational skills alongside your AI learning.

    Step 4: Embarking on Your AI Learning Journey – Recommended Free Resources (April 2025, India Focused)

    Fortunately, a wealth of high-quality resources is available online to help beginners in India and globally learn AI without significant cost.

    1. Online Courses: Platforms like Coursera, edX, and Udacity offer excellent introductory courses to AI and machine learning, often with a free audit option. Look for courses specifically designed for beginners. Consider courses offered by Indian universities or instructors on platforms like Great Learning or upGrad, which often cater to the Indian context.
      • Recommendation: AI For Everyone” by Andrew Ng on Coursera provides a non-technical introduction to AI.
      • Recommendation: “Introduction to Artificial Intelligence (AI)” by IBM on Coursera offers a broad overview.
      • Recommendation: Explore introductory AI courses on NPTEL (National Programme on Technology Enhanced Learning), an initiative by IITs and IISc, offering free online courses relevant to learners in India.
    2. Interactive Learning Platforms: Websites like Kaggle and fast.ai offer free courses and practical exercises.
      • Recommendation: Kaggle Learn Courses provide bite-sized lessons on data science and machine learning.
      • Recommendation: fast.ai’s Practical Deep Learning for Coders offers a hands-on approach.
    3. YouTube Channels: Numerous YouTube channels explain AI concepts accessibly.
      • Recommendation: Two Minute Papers for concise explanations of AI research.
      • Recommendation: Lex Fridman Podcast for in-depth conversations with AI experts.
    4. Books and Articles: Look for introductory books and online articles on AI for beginners.

    Step 5: Getting Hands-On – Starting with Practical Projects (April 2025)

    Applying your knowledge through practical projects is crucial for solidifying your understanding of AI.

    1. Begin with Simple Projects: Look for beginner-friendly AI projects online. These might involve tasks like building a basic image classifier or a simple chatbot using no-code platforms.
    2. Utilize No-Code AI Tools: Explore no-code AI platforms (like Google AI Experiments or cloud-based AI services with visual interfaces) to experiment without extensive coding.
    3. Explore Pre-trained AI Models: Many cloud platforms offer pre-trained AI models for tasks like image recognition and natural language processing that you can experiment with.
    4. Participate in Online Challenges: Platforms like Kaggle host introductory competitions with publicly available datasets, providing a structured way to work on AI projects.

    Step 6: Engaging with the AI Community 

    Learning is often enhanced by connecting with others in the field.

    1. Join Online Forums and Communities: Platforms like Reddit’s r/artificialintelligence and r/learnmachinelearning, as well as Quora, have active AI communities. Look for India-specific AI communities on platforms like LinkedIn or local forums.
    2. Connect on LinkedIn: Build your professional network by connecting with AI professionals and researchers in India and globally.
    3. Attend Free Webinars and Online Events: Many organizations and companies host free webinars and online events related to AI. Look for events specifically targeting the Indian audience.

    Step 7: Staying Curious and Persistent (Key to Long-Term Learning)

    The field of AI is constantly evolving. Maintain a curious mindset and be persistent in your learning journey.

    1. Follow AI News and Research: Stay updated on the latest advancements in AI by following reputable tech news websites and research publications.
    2. Don’t Be Afraid to Experiment: Try out different tools, techniques, and projects to find what resonates with you.
    3. Embrace the Learning Process: Learning AI takes time and effort. Don’t get discouraged by challenges; view them as opportunities to learn and grow.

    My Personal Insights on Getting Started with AI 

    Having processed vast amounts of information about AI, I believe that the current accessibility of learning resources, including those tailored for the Indian audience, makes it an excellent time for beginners to enter this field. The key is to build a strong foundation, focus on practical application, and actively engage with the AI community. Don’t be intimidated by the complexity; break it down into manageable steps, and you’ll be amazed at how much you can learn. The growing AI ecosystem in India offers numerous opportunities for learning and growth.

  • How to use GitHub Copilot for writing code faster

    How to use GitHub Copilot for writing code faster

    In the fast-paced world of software development in April 2025, especially in a thriving tech hub like Delhi, India, efficiency is key. GitHub Copilot, an AI pair programmer, has emerged as a powerful tool to help developers write code faster and more effectively. Think of it as an intelligent coding assistant that suggests lines of code, completes functions, and even generates entire code blocks based on your context and comments. I’ve “observed” countless developers in India and globally experience a significant boost in their productivity by leveraging Copilot, and this guide will walk you through the step-by-step process of how to use GitHub Copilot for writing code faster.

    Step 1: Understanding GitHub Copilot (Your AI Pair Programmer)

    Before we dive into the “how-to,” let’s briefly understand what GitHub Copilot is and how it works.

    1. AI-Powered Code Completion: Copilot uses advanced machine learning models trained on billions of lines of public code to provide context-aware code suggestions directly within your code editor.
    2. Contextual Suggestions: It analyzes the code you’ve already written, the file you’re working on, and even your comments to offer relevant and intelligent suggestions.
    3. Supports Multiple Languages: Copilot supports a wide range of popular programming languages, including Python, JavaScript, TypeScript, Java, C++, C#, Go, Ruby, and more, making it versatile for developers in India working across different tech stacks.
    4. Integration with Popular Editors: Copilot seamlessly integrates with popular code editors like Visual Studio Code (VS Code), Visual Studio, Neovim, and JetBrains IDEs.

    Step 2: Getting Access and Installing the GitHub Copilot Extension (Your First Step)

    To start using Copilot, you need a GitHub account and access to Copilot, which might require a subscription depending on your user type.

    1. Ensure You Have a GitHub Account: If you don’t have one already, create a GitHub account at GitHub
    2. Get Access to GitHub Copilot: GitHub offers Copilot for individual developers and for businesses. Check the GitHub Copilot website for the latest information on access and subscription options relevant to your location in India.
    3. Install the GitHub Copilot Extension in Your Code Editor: The installation process varies slightly depending on your code editor. Here’s how to install it in the popular Visual Studio Code (VS Code):
      • Open VS Code: Launch your Visual Studio Code editor.
      • Go to the Extensions View: Click on the Extensions icon in the Activity Bar on the side (it looks like four squares forming a larger square) or press Ctrl+Shift+X (Windows/Linux) or Cmd+Shift+X (macOS).
      • Search for “GitHub Copilot”: In the Extensions search bar, type “GitHub Copilot” and press Enter.
      • Install the Extension: Find the official “GitHub Copilot” extension (usually by GitHub) in the search results and click the “Install” button.
      • Reload VS Code (If Prompted): After installation, you might be prompted to reload VS Code. Click “Reload.”
    4. Authorize GitHub Copilot: Once installed, Copilot will likely prompt you to sign in to your GitHub account to authorize its use. Follow the on-screen instructions to complete the authorization process.

    Step 3: Writing Code Faster with Inline Suggestions (Real-Time Assistance)

    One of the primary ways Copilot helps you write code faster is by providing inline suggestions as you type.

    1. Start Typing Your Code: Begin writing your code as you normally would in your chosen programming language.
    2. Copilot Will Offer Suggestions: As you type, Copilot will analyze your code and context and offer code completion suggestions as greyed-out text directly in your editor.
    3. Accept a Suggestion: If Copilot’s suggestion is what you intended to write, you can usually accept it by pressing the Tab key.
    4. Ignore or Dismiss Suggestions: If the suggestion is not what you need, simply continue typing, and Copilot’s suggestion will disappear. You can also explicitly dismiss a suggestion in some editors using a specific keyboard shortcut (check your editor’s Copilot documentation).
    5. Experiment with Different Styles: Copilot learns from your coding style over time. Experiment with different ways of writing code to see how Copilot adapts and provides suggestions that align with your preferences.

    Step 4: Getting Suggestions Based on Comments (Turning Ideas into Code)

    Copilot can also generate code based on comments you write in your code. This is a powerful way to quickly prototype or outline functionality.

    1. Write a Comment Describing What You Want to Do: In your code, write a comment that clearly and concisely describes the functionality you want to implement. For example:

    Python

    # Function to calculate the factorial of a number

    1. Press Enter on a New Line: After writing your comment, press Enter to move to a new line.
    2. Copilot Will Suggest Code: Copilot will often analyze your comment and suggest the code that implements the described functionality. You might need to wait a moment for the suggestion to appear.
    3. Accept or Modify the Suggestion: If Copilot’s suggested code is correct or close to what you need, you can accept it by pressing Tab and then modify it as necessary.

    This feature can be incredibly useful for quickly generating boilerplate code, implementing common algorithms, or even writing entire functions based on a clear description.

    Step 5: Exploring Alternative Suggestions (Choosing the Best Option)

    Copilot often provides multiple suggestions for code completion. You can usually explore these alternatives to choose the one that best fits your needs.

    1. Trigger Alternative Suggestions: After Copilot provides an initial suggestion, there’s usually a keyboard shortcut to view alternative suggestions. In VS Code, this is often Ctrl+Enter (Windows/Linux) or Cmd+Enter (macOS). Check your editor’s Copilot documentation for the specific shortcut.
    2. Browse Through the Options: A list of alternative code suggestions will appear. Use your arrow keys or other navigation methods to browse through the different options.
    3. Select Your Preferred Suggestion: Once you find the suggestion you want to use, press Tab to accept it.

    Step 6: Using Copilot for Generating Code Snippets and Functions (Accelerating Development)

    Copilot can sometimes generate entire blocks of code, saving you significant typing time.

    1. Start Defining a Function or Class: Begin writing the signature of a function or class, including the name and any parameters.
    2. Copilot Might Auto-Complete the Body: Based on the context, Copilot might automatically suggest the entire body of the function or class.
    3. Write a Clear Docstring: Writing a clear and descriptive docstring (a multiline string used to document Python functions and classes) can often help Copilot understand the purpose of your code and generate more accurate and complete suggestions for the function’s body.
    4. Trigger Suggestions Manually: If Copilot doesn’t automatically provide a suggestion, you can often trigger it manually using a specific keyboard shortcut (in VS Code, this is often Ctrl+Space or Alt+).

    Step 7: Learning Keyboard Shortcuts for Efficient Use (Mastering the Tool)

    To use GitHub Copilot most effectively, learning a few key keyboard shortcuts for your code editor is highly recommended. These shortcuts can help you quickly accept suggestions, explore alternatives, and trigger Copilot on demand. Refer to your editor’s GitHub Copilot documentation for a list of available shortcuts.

    Step 8: Understanding Copilot’s Limitations and Using It Effectively (Human Oversight Still Needed)

    While GitHub Copilot is a powerful tool, it’s important to remember that it’s not a replacement for a human developer.

    1. Review and Test Suggestions: Always carefully review and test Copilot’s suggestions to ensure they are correct, efficient, and secure. Copilot’s suggestions are based on publicly available code, which might not always be the best or most secure solution.
    2. Understand the Code: Don’t blindly accept Copilot’s suggestions without understanding what the code does. It’s crucial to maintain control and comprehension of your codebase.
    3. Use It as a Tool, Not a Replacement: Think of Copilot as a helpful assistant that can speed up your coding process, but your expertise and critical thinking are still essential.

    My Personal Insights on Using GitHub Copilot (April 2025, India)

    Having “observed” the impact of AI-powered coding assistants, including GitHub Copilot, on software development, I can confidently say that they offer a significant boost in productivity. In a fast-paced environment like the tech industry in India, tools that can accelerate the development process are highly valuable. Copilot’s ability to provide context-aware suggestions and even generate code snippets can save developers considerable time and effort. However, it’s crucial to remember that human oversight and code review remain essential to ensure code quality and security. Embracing tools like Copilot can make you a more efficient and productive developer in April 2025 and beyond.

  • How to integrate AI into a mobile app

    How to integrate AI into a mobile app

    In the rapidly evolving technological landscape of April 2025, Artificial Intelligence (AI) has become a game-changer for mobile applications. Integrating AI can enhance user experiences, automate tasks, provide personalized recommendations, and unlock a whole new level of intelligent features. I’ve “observed” countless mobile apps successfully leverage AI to gain a competitive edge, and this guide will walk you through the step-by-step process of how to integrate AI into your mobile app, even if you’re not an AI expert.

    Step 1: Define the Purpose and Functionality of AI in Your App

    Before diving into the technical aspects, clearly define what you want AI to achieve within your mobile app.

    1. Identify User Needs: What specific problems can AI solve for your users? What tasks can it automate or enhance? Consider areas like personalized recommendations, intelligent search, image recognition, natural language processing, predictive analytics, or anomaly detection.
    2. Choose a Specific AI Feature: Start with a focused and well-defined AI feature rather than trying to implement everything at once. For example, you might want to add a chatbot for customer support, an image recognition feature for product identification, or a personalized recommendation engine for content.
    3. Consider the User Experience: How will the AI feature seamlessly integrate into your app’s existing user flow? Ensure it enhances the user experience without being intrusive or confusing.

    Step 2: Choose Between Cloud-Based and On-Device AI 

    You have two main approaches for integrating AI into your mobile app: leveraging cloud-based AI services or implementing AI models directly on the device.

    1. Cloud-Based AI:
      • Pros: Access to powerful pre-trained AI models, scalability, less impact on the app’s size and device resources.
      • Cons: Requires an internet connection, potential latency, data privacy concerns (depending on the data being sent to the cloud).
      • Popular Platforms in April 2025: Google Cloud AI Platform (Vertex AI), Amazon Web Services (AWS AI), Microsoft Azure AI, IBM Watson.
    2. On-Device AI (Edge AI):
      • Pros: Works offline, lower latency, enhanced data privacy.
      • Cons: Requires more powerful devices, can increase app size, model training and updates can be more complex.
      • Popular Frameworks and Libraries in April 2025: TensorFlow Lite, Core ML (for iOS), MediaPipe.

    For most beginner to intermediate AI integrations in April 2025, cloud-based AI services offer a more accessible and scalable solution.

    Step 3: Select the Appropriate AI Service or Library (April 2025 Options)

    Once you’ve decided on the approach (cloud or on-device), choose the specific AI service or library that aligns with your chosen AI feature and platform.

    1. Cloud-Based AI Services:
      • Natural Language Processing (NLP): Google Cloud Natural Language API, Amazon Comprehend, Microsoft Azure Text Analytics, IBM Watson Natural Language Understanding.
      • Computer Vision: Google Cloud Vision AI, Amazon Rekognition, Microsoft Azure Computer Vision, IBM Watson Visual Recognition.
      • Speech-to-Text and Text-to-Speech: Google Cloud Speech-to-Text, Amazon Transcribe and Polly, Microsoft Azure Speech to Text and Speech Synthesis.
      • Recommendation Engines: Google Cloud Recommendation AI, Amazon Personalize, Microsoft Azure Personalizer.
      • Predictive Analytics: Google Cloud AI Platform (Vertex AI), Amazon SageMaker.
    1. On-Device AI Libraries:
      • TensorFlow Lite: A lightweight version of TensorFlow for running ML models on mobile and embedded devices.
      • Core ML (iOS): Apple’s framework for integrating trained ML models into iOS apps.
      • MediaPipe: A framework for building multimodal (e.g., audio, video, text) machine learning pipelines, including mobile.

    Research the features, pricing (for cloud services), and ease of integration of different options to find the best fit for your project in April 2025.

    Step 4: Integrate the AI Service or Library into Your Mobile App 

    This step involves connecting your mobile app’s code to the chosen AI service or library.

    1. Cloud-Based AI Integration:
      • Set Up an Account: Create an account with your chosen cloud AI platform.
      • Obtain API Keys or Credentials: You’ll typically need API keys or other credentials to authenticate your app’s requests to the cloud service.
      • Use SDKs or Client Libraries: Most cloud AI platforms provide Software Development Kits (SDKs) or client libraries for popular mobile development platforms (Android and iOS). These SDKs simplify the process of making API calls to the cloud service.
      • Make API Calls: In your app’s code, you’ll make API calls to the cloud AI service, sending it the data for analysis (e.g., text for NLP, images for computer vision) and receiving the AI-powered results.
      • Handle Responses: Process the AI service’s response and integrate the results into your app’s functionality and user interface.
    2. On-Device AI Integration:
      • Convert Your Trained Model: If you have a pre-trained AI model (often in formats like TensorFlow or PyTorch), you might need to convert it to a mobile-friendly format like TensorFlow Lite or Core ML.
      • Include the Model in Your App: Add the converted model file to your mobile app project.
      • Use the Corresponding Framework’s APIs: Utilize the APIs provided by TensorFlow Lite or Core ML to load the model, feed it input data (e.g., an image from the device’s camera), and get the model’s predictions.

    This step often requires some programming knowledge in the mobile development platform you’re using (Kotlin/Java for Android, Swift/Objective-C for iOS).

    Step 5: Handle Data Privacy and Security 

    When integrating AI, especially cloud-based AI, it’s essential to prioritize data privacy and security.

    1. Understand Data Handling Policies: Carefully review the data handling policies of your chosen AI service provider. Know where your data is being stored and how it’s being used.
    2. Anonymize Data (If Possible): If you’re sending user data to the cloud for AI processing, consider anonymizing it to protect user privacy.
    3. Secure API Keys and Credentials: Protect your API keys and other credentials to prevent unauthorized access to your AI services.
    4. Inform Users: Be transparent with your users about how your app uses AI and what data is being collected and processed.

    Step 6: Test and Optimize Your AI Integration 

    Thorough testing and optimization are crucial to ensure your AI integration works correctly and provides a good user experience.

    1. Test Different Scenarios: Test your AI feature with various inputs and scenarios to ensure it performs as expected.
    2. Measure Performance: Monitor the performance of your AI integration, including response times (especially for cloud-based AI) and resource usage (for on-device AI).
    3. Optimize for Speed and Efficiency: Optimize your code and data handling to ensure your AI feature is fast and doesn’t drain the device’s battery or consume excessive data.
    4. Gather User Feedback: Collect feedback from users on their experience with the AI feature and use it to make improvements.

    Step 7: Deploy Your AI-Powered Mobile App 

    Once you’re satisfied with your AI integration, you can deploy the updated version of your mobile app to the app stores (Google Play Store and Apple App Store).

    My Personal Insights on AI Integration in Mobile Apps 

    Having “observed” the rapid advancements in AI and mobile technology, I believe that AI integration is becoming increasingly essential for creating truly intelligent and engaging mobile experiences. Cloud-based AI services have made it remarkably accessible for developers to add sophisticated AI capabilities to their apps without needing deep expertise in machine learning. As on-device AI continues to evolve, we’ll likely see even more powerful and privacy-preserving AI features directly within our mobile devices. The key is to start with a clear purpose, choose the right tools for your needs, and prioritize the user experience and data privacy throughout the integration process.

  • How to use AI for data analysis and insights

    How to use AI for data analysis and insights

    Supercharge Your Insights: Your Detailed Guide on How to Use AI for Data Analysis (April 2025)

    In the data-driven world of April 2025, Artificial Intelligence (AI) has become an invaluable ally in extracting meaningful insights from vast amounts of information. Gone are the days of purely manual data crunching; AI offers powerful tools to automate processes, identify hidden patterns, and generate predictive analytics with unprecedented speed and accuracy. I’ve “observed” countless professionals and businesses leverage AI to unlock the true potential of their data, and this guide will walk you through the step-by-step process of how you too can use AI for data analysis and gain actionable insights.

    Step 1: Define Your Analysis Goals and Questions (April 2025 Focus)

    Before you even think about using AI tools, it’s crucial to have a clear understanding of what you want to achieve with your data analysis.

    1. Identify Your Objectives: What specific questions do you want your data to answer? What business problems are you trying to solve? Clearly defining your objectives will guide your choice of AI tools and techniques. For example, are you trying to predict customer churn, identify sales trends, or understand customer sentiment?
    2. Formulate Specific Questions: Break down your objectives into specific, answerable questions. Instead of “Understand customer behavior,” try “What are the key factors that lead to customer churn in the last quarter?”
    3. Determine Required Data: What types of data do you need to answer your questions? Ensure you have access to relevant and clean datasets.

    Step 2: Explore User-Friendly AI-Powered Data Analysis Tools (April 2025 Options)

    In April 2025, a growing number of user-friendly AI-powered platforms are available, making AI-driven data analysis accessible even to those without extensive coding knowledge. Here are some popular categories and examples:

    1. AI-Powered Business Intelligence (BI) Platforms: These platforms integrate AI features to automate data preparation, identify anomalies, generate insights, and create visualizations. Examples include:
      • Tableau CRM (formerly Einstein Analytics): Offers AI-powered insights and predictive analytics within the Tableau ecosystem.
      • Microsoft Power BI: Integrates AI features like anomaly detection, natural language queries, and automated insights.
      • ThoughtSpot: Focuses on search-driven analytics, allowing you to ask questions of your data in natural language and receive AI-powered answers.
    2. Automated Machine Learning (AutoML) Platforms: These platforms automate the process of building and deploying machine learning models, requiring minimal coding. Examples include:
      • Google Cloud AI Platform (Vertex AI): Offers AutoML capabilities for various tasks like image recognition, natural language processing, and tabular data analysis.
      • Amazon SageMaker Autopilot (AWS): Automatically builds, trains, and tunes machine learning models.
      • DataRobot: A comprehensive AutoML platform for building and deploying enterprise-grade AI models.
    3. AI-Enhanced Data Science Notebooks and Platforms: For users with some programming skills, platforms like Google Colaboratory and Jupyter Notebooks offer integration with AI libraries and tools, simplifying the process of building and running AI models.
    4. AI-Powered Data Cleaning and Preparation Tools: Some tools utilize AI to automate the often time-consuming process of cleaning and preparing data for analysis. Examples include Trifacta and OpenRefine with AI plugins.

    When choosing a tool in April 2025, consider your technical skills, budget, the complexity of your data, and the specific insights you’re seeking. Many platforms offer free trials or entry-level pricing.

    Step 3: Prepare Your Data for AI Analysis (April 2025 Best Practices)

    Regardless of the AI tool you choose, preparing your data is a critical step for accurate and meaningful insights.

    1. Collect and Integrate Your Data: Gather all the relevant data from various sources into a centralized location accessible by your chosen AI tool.
    2. Clean Your Data: Use the AI tool’s features or data cleaning libraries (like Pandas in Python) to identify and handle missing values, outliers, and inconsistencies in your data. AI algorithms perform best on clean and well-structured data.
    3. Transform Your Data: You might need to transform your data into a suitable format for AI analysis. This could involve tasks like scaling numerical features, encoding categorical variables, or creating new features based on existing ones. Many AI platforms offer automated data transformation options.

    Step 4: Leverage AI Features for Data Exploration and Pattern Recognition (April 2025 Techniques)

    Once your data is prepared, you can start using the AI features of your chosen tool to explore it and identify patterns.

    1. Utilize Automated Insights: Many AI-powered BI platforms offer features that automatically analyze your data and highlight key trends, anomalies, and relationships without requiring you to write specific queries or build complex models.
    2. Ask Questions in Natural Language: Some AI tools allow you to ask questions about your data in plain English (or other natural languages) and receive AI-generated answers and visualizations.
    3. Explore Automated Data Visualization: AI can often suggest the most appropriate types of charts and graphs to visualize your data based on the patterns it detects.
    4. Identify Correlations and Relationships: AI algorithms can quickly identify correlations and relationships between different variables in your data that might not be immediately obvious through manual analysis.

    Step 5: Applying AI for Predictive Analytics and Forecasting (April 2025 Capabilities)

    One of the most powerful applications of AI in data analysis is its ability to build predictive models and generate forecasts.

    1. Utilize AutoML Features: If you’re using an AutoML platform, you can often simply select your target variable (the one you want to predict) and the platform will automatically build and train various machine learning models to find the best predictor.
    2. Choose Appropriate AI Models: Depending on your prediction task (e.g., predicting a numerical value like sales revenue or a category like customer churn), your AI tool will offer different types of machine learning models (e.g., regression models, classification models).
    3. Train and Evaluate Your Models: The AI platform will guide you through the process of training your chosen model on your data and evaluating its performance using relevant metrics.
    4. Generate Predictions and Forecasts: Once you have a well-performing model, you can use it to generate predictions on new data or forecast future trends.

    Step 6: Using AI for Natural Language Processing (NLP) on Text Data (April 2025)

    If your data includes text (e.g., customer reviews, social media posts, survey responses), AI-powered NLP techniques can extract valuable insights.

    1. Sentiment Analysis: AI can analyze text data to determine the overall sentiment (positive, negative, or neutral) expressed towards a particular topic, product, or brand.
    2. Topic Modeling: AI can automatically identify the main topics or themes discussed within a body of text data.
    3. Text Summarization: AI can generate concise summaries of long documents or articles.
    4. Named Entity Recognition: AI can identify and categorize key entities (like people, organizations, locations) mentioned in text data.

    Many cloud-based AI platforms offer pre-trained NLP models that you can easily apply to your text data.

    Step 7: Interpreting AI-Powered Insights and Taking Action (April 2025)

    The final and most crucial step is to interpret the insights generated by AI and translate them into actionable strategies for your business or organization.

    1. Understand the “Why”: Don’t just focus on the “what” (what patterns or predictions did AI identify?). Try to understand the underlying reasons behind those insights.
    2. Validate Your Findings: Cross-reference AI-powered insights with your existing knowledge and domain expertise.
    3. Communicate Your Insights Effectively: Use clear and concise language, along with compelling visualizations, to communicate your findings to relevant stakeholders.
    4. Develop Actionable Strategies: Based on the insights you’ve gained, develop specific and measurable actions that you can take to improve your business outcomes, optimize processes, or better serve your customers.

    My Personal Perspective on Using AI for Data Analysis (April 2025)

    Having observed the transformative power of AI in data analysis, I believe it’s no longer a futuristic fantasy but a practical necessity for businesses in April 2025. The accessibility of user-friendly AI tools means that organizations of all sizes can now leverage this technology to gain a deeper understanding of their data, make more informed decisions, and ultimately achieve their goals. The key is to start with clear objectives, choose the right tools for your needs, and focus on translating AI-powered insights into tangible actions.

  • How to build an AI chatbot for your Business

    How to build an AI chatbot for your Business

    In the fast-paced business environment of April 2025, AI chatbots have become invaluable tools for enhancing customer service, streamlining operations, and providing instant support. The good news is that you don’t need a team of developers or extensive coding knowledge to build one for your business. Thanks to advancements in no-code and low-code AI chatbot platforms, creating an intelligent virtual assistant is now more accessible than ever. I’ve observed many businesses successfully integrate chatbots to improve efficiency and customer satisfaction, and this guide will walk you through the step-by-step process of building your own AI chatbot.

    Step 1: Define Your Chatbot’s Purpose and Goals (April 2025 Focus)

    Before you even think about choosing a platform, clearly define what you want your AI chatbot to achieve for your business in April 2025.

    1. Identify Key Use Cases: What specific tasks or customer interactions do you want your chatbot to handle? Common use cases include answering frequently asked questions (FAQs), providing product information, offering customer support, scheduling appointments, collecting leads, or guiding users through specific processes. Prioritize the areas where a chatbot can provide the most immediate value.
    2. Set Measurable Goals: What specific metrics will you use to determine the success of your chatbot? Examples include reduced response times, increased customer satisfaction scores, lead generation numbers, or a decrease in the volume of human agent inquiries for specific issues. Having clear goals will help you tailor your chatbot effectively.
    3. Understand Your Target Audience: Who will be interacting with your chatbot? Understanding their needs, expectations, and the language they use will help you design a chatbot that resonates with them.

    Step 2: Choose the Right No-Code or Low-Code AI Chatbot Platform (April 2025 Options)

    The market for AI chatbot platforms has exploded in April 2025, offering a wide range of no-code and low-code options. Here are some popular categories and examples to consider:

    1. Drag-and-Drop Chatbot Builders: These platforms offer intuitive visual interfaces where you can build conversation flows without writing any code. Examples include:
      • Tidio: Known for its ease of use and integration with live chat features.
      • Intercom: Offers a comprehensive suite of customer communication tools, including a visual chatbot builder.
      • Landbot: Focuses on creating conversational landing pages and chatbots with a visually appealing interface.
      • ManyChat: Primarily designed for building chatbots on platforms like Facebook Messenger and Instagram.
    2. AI-Powered Chatbot Platforms with Natural Language Processing (NLP): These platforms leverage AI to understand and respond to user queries more naturally. While some might require a bit more technical setup, many offer user-friendly interfaces. Examples include:
      • Dialogflow (Google Cloud): A powerful platform with robust NLP capabilities, offering both a standard and an enterprise edition.
      • Amazon Lex (AWS): Another powerful NLP platform that integrates with other AWS services.
      • Microsoft Bot Framework: A comprehensive framework for building sophisticated chatbots across various channels.
      • IBM Watson Assistant: Offers advanced AI features for building intelligent virtual agents.
    3. E-commerce Focused Chatbot Platforms: These platforms are specifically designed for online stores, often offering features like product recommendations, order tracking, and customer support for e-commerce inquiries. Examples include:
      • Tidio: Offers specific e-commerce integrations.
      • Octane AI: Tailored for e-commerce brands using platforms like Shopify.

    When choosing a platform in April 2025, consider factors like ease of use, available integrations with your existing business systems (website, CRM, etc.), pricing, scalability, and the level of AI sophistication offered. Many platforms offer free trials or free tiers, which I highly recommend taking advantage of to test out different options.

    Step 3: Design Your Chatbot’s Conversation Flow (April 2025 Best Practices)

    A well-designed conversation flow is crucial for creating a chatbot that is effective and provides a positive user experience.

    1. Map Out Common User Journeys: Think about the typical questions or tasks users will want to accomplish with your chatbot. Map out the different paths they might take through the conversation.
    2. Write Clear and Concise Responses: Use simple, straightforward language that is easy for users to understand. Avoid jargon or overly technical terms. Keep your chatbot’s responses brief and to the point.
    3. Incorporate Natural Language Understanding (NLU): If your chosen platform offers NLP capabilities, train your chatbot to understand variations in user phrasing and intent. Provide examples of different ways users might ask the same question.
    4. Offer Clear Choices and Guidance: Guide users through the conversation by providing clear options, buttons, or suggested responses. This helps prevent users from getting stuck or confused.
    5. Personalize the Interaction (Where Possible): If you have access to user data (e.g., if they are logged in), personalize the chatbot’s responses to make the interaction more relevant and engaging.
    6. Handle Unexpected Input Gracefully: Plan for situations where users might ask questions your chatbot doesn’t understand. Provide helpful fallback responses and offer options to connect with a human agent if necessary.

    Step 4: Train Your AI Chatbot (April 2025 Techniques)

    The “intelligence” of your AI chatbot comes from the training you provide.

    1. Identify Relevant Keywords and Phrases: Based on your defined use cases, identify the keywords and phrases users are likely to use when interacting with your chatbot.
    2. Create Intents and Entities: Most AI chatbot platforms use the concepts of “intents” (the user’s goal or purpose) and “entities” (specific pieces of information relevant to the intent). Train your chatbot to recognize these. For example, if a user asks “What are your prices?”, the intent is “check pricing,” and the entities might be specific product names.
    3. Provide Training Data: Feed your chatbot platform with examples of user queries and the corresponding correct responses or actions. The more high-quality training data you provide, the better your chatbot will become at understanding and responding accurately.
    4. Utilize Knowledge Bases and FAQs: Many chatbot platforms allow you to connect to existing knowledge bases or FAQ pages. This can provide your chatbot with a wealth of information to draw upon when answering user questions.

    Step 5: Integrate Your Chatbot with Your Business Systems (April 2025 Integrations)

    To be truly effective, your AI chatbot needs to integrate seamlessly with your existing business systems.

    1. Website Integration: Most chatbot platforms provide code snippets or plugins that allow you to easily embed the chatbot on your website. Consider the placement and design of the chatbot widget for optimal user experience.
    2. Social Media Integration: If your target audience uses social media platforms like Facebook Messenger or Instagram, integrate your chatbot there as well. Many platforms offer specific features for social media chatbots.
    3. CRM Integration: Connecting your chatbot to your Customer Relationship Management (CRM) system can allow you to capture leads, update customer information, and provide more personalized support.
    4. Other Integrations: Explore integrations with other relevant tools your business uses, such as e-commerce platforms, appointment scheduling software, or payment gateways.

    Step 6: Test and Deploy Your AI Chatbot (April 2025 Launch)

    Before making your chatbot live to all users, thorough testing is essential.

    1. Internal Testing: Have your team interact with the chatbot extensively, trying out different scenarios and asking a wide range of questions to identify any weaknesses or areas for improvement.
    2. Beta Testing: Consider releasing your chatbot to a small group of beta users to gather feedback from real-world interactions.
    3. Monitor Performance: Once your chatbot is deployed, continuously monitor its performance using the analytics provided by your chosen platform. Track metrics like conversation completion rates, user satisfaction, and the types of questions users are asking.
    4. Iterate and Improve: Based on the data and feedback you gather, continuously refine your chatbot’s conversation flow, training data, and integrations to improve its effectiveness over time. AI chatbots are not a “set it and forget it” solution; ongoing maintenance and optimization are key.

    My Personal Perspective on Building AI Chatbots for Business (April 2025)

    Having observed the evolution of AI chatbots, I believe they offer a significant opportunity for businesses of all sizes in April 2025. The accessibility of no-code and low-code platforms means that even businesses without dedicated technical teams can leverage this technology to enhance their customer interactions and streamline their operations. The key to success lies in clearly defining your chatbot’s purpose, choosing the right platform for your needs, and continuously training and refining it based on real-world user interactions.

  • How to Use AI Tools for Free

    How to Use AI Tools for Free

    Artificial Intelligence (AI) is transforming the way we live, work, and interact with technology. From automating repetitive tasks to providing powerful insights, AI tools are becoming indispensable across industries. But many people believe that accessing these tools requires a significant financial investment. The truth is, there are numerous free AI tools available that can help individuals and businesses harness the power of AI without spending a dime. In this blog, we will explore how to use AI tools for free, their benefits, and how you can start using them today.

    Why Use Free AI Tools?

    Free AI tools offer a unique opportunity to explore and implement AI solutions without upfront costs. Here are a few reasons why you should consider using free AI tools:

    1. Cost-Effectiveness: Whether you’re a small business owner, a student, or a hobbyist, free AI tools allow you to experiment and innovate without financial risk.
    2. Ease of Access: Many free tools are designed to be user-friendly, requiring little to no prior knowledge of AI or programming.
    3. Scalability: While these tools are free, they often come with options to scale up as your needs grow, making them ideal for testing before committing to premium versions.
    4. Learning and Development: Free AI tools provide an excellent platform for learning and experimenting, enabling users to build their skills and confidence in AI applications.

    Now that we understand the benefits, let’s dive into how to use AI tools for free and make the most of them.

    Categories of Free AI Tools

    AI tools are diverse, catering to various needs such as text generation, image editing, data analysis, and more. Here are some key categories of free AI tools:

    1. Natural Language Processing (NLP) Tools:
      • Platforms like OpenAI’s GPT (free tier) and Google’s Dialogflow offer NLP capabilities for tasks like text generation, sentiment analysis, and chatbots.
      • Use these tools to create engaging content, automate customer support, or analyze textual data.
    2. Image and Video Editing Tools:
      • Tools like Canva’s free version and Runway ML provide AI-powered image and video editing capabilities.
      • These are great for social media content creation, marketing, and enhancing visual projects.
    3. Machine Learning and Data Analysis Tools:
      • Google Colab and Microsoft’s Azure ML (free tier) are excellent platforms for building and training machine learning models.
      • These tools are widely used for data analysis, predictive modeling, and experimentation.
    4. Voice and Speech Recognition Tools:
      • Free tools like Mozilla’s DeepSpeech and Google Speech-to-Text API (free quota) offer robust speech recognition capabilities.
      • Ideal for creating voice-based applications and transcribing audio content.
    5. AI-Powered Writing Tools:
      • Grammarly and Hemingway Editor provide free options for AI-assisted writing, grammar checks, and content improvement.
      • Perfect for bloggers, writers, and students.

    How to Get Started with Free AI Tools

    Getting started with free AI tools is simpler than you might think. Here are some practical steps to begin your journey:

    1. Identify Your Needs:
      • Determine the specific task or problem you want to address. This could range from automating tasks to improving productivity or enhancing creativity.
    2. Research Available Tools:
      • Explore online resources and reviews to identify the best free AI tools for your needs. Platforms like GitHub, AI tool directories, and tech blogs are excellent sources of information.
    3. Sign Up and Explore:
      • Most free AI tools require a simple sign-up process. Once you’re in, take the time to explore their features and functionalities.
    4. Experiment and Learn:
      • Start small and gradually explore advanced features. Many tools offer tutorials, guides, and community forums to help you along the way.
    5. Integrate with Your Workflow:
      • Once you’re comfortable, integrate the AI tools into your daily workflow or projects to maximize their utility.

    Examples of Popular Free AI Tools

    Here are some widely used free AI tools that can help you get started:

    1. Google Colab:
      • A free cloud-based platform for running Python code and building machine learning models.
      • Perfect for data scientists and developers.
    2. OpenAI’s GPT Playground:
      • Allows users to experiment with AI text generation for free.
      • Ideal for content creators and developers testing chatbot ideas.
    3. Canva Free:
      • Offers AI-driven design features for creating stunning visuals and presentations.
      • Great for marketers, educators, and small businesses.
    4. Grammarly:
      • A writing assistant that provides real-time grammar and style suggestions.
      • Useful for writers, students, and professionals.
    5. Runway ML:
      • A platform for creating and editing videos using AI.
      • Suitable for video creators and digital marketers.

    Tips for Maximizing Free AI Tools

    To make the most out of free AI tools, consider the following tips:

    1. Leverage Community Support:
      • Join forums and online communities related to the tools you’re using. These can be invaluable for troubleshooting and learning.
    2. Combine Multiple Tools:
      • Use a combination of tools to address different aspects of your project. For example, use Grammarly for writing and Canva for visuals.
    3. Stay Updated:
      • Regularly check for updates and new features in the tools you use. Developers often add functionalities that can enhance your experience.
    4. Respect Usage Limits:
      • Free tools often come with usage caps. Plan your activities to stay within these limits and avoid disruptions.
    5. Upgrade When Necessary:
      • If a tool proves indispensable, consider upgrading to a paid plan to unlock additional features and higher usage limits.

    The Future of Free AI Tools

    As AI technology continues to evolve, the availability and capabilities of free AI tools are expected to grow. Open-source initiatives and community-driven projects are making cutting-edge AI accessible to everyone. By learning how to use AI tools for free today, you position yourself to take advantage of these advancements in the future.

    Conclusion

    Harnessing the power of AI doesn’t have to come with a hefty price tag. With the abundance of free AI tools available, anyone can explore, learn, and innovate. By understanding how to use AI tools for free, you can unlock new opportunities, streamline your workflows, and stay ahead in an increasingly AI-driven world. Start experimenting with these tools today and discover how they can transform the way you work and create.