System Restore is a powerful feature in Windows that allows you to revert your computer’s state to an earlier point in time, known as a restore point. This can be incredibly useful for troubleshooting and fixing problems caused by recent software installations, driver updates, or system configuration changes, all without affecting your personal files like documents, photos, or videos.
Understanding System Restore Points
A restore point is a snapshot of your Windows operating system’s critical system files, installed programs, registry settings, and drivers at a specific time. Windows automatically creates restore points before significant events like installing updates or new software. You can also create them manually. When you perform a system restore, Windows replaces your current system files with those from the selected restore point.
Step 1: Access System Restore
There are a few ways to get to the System Restore utility in Windows 10 and Windows 11.
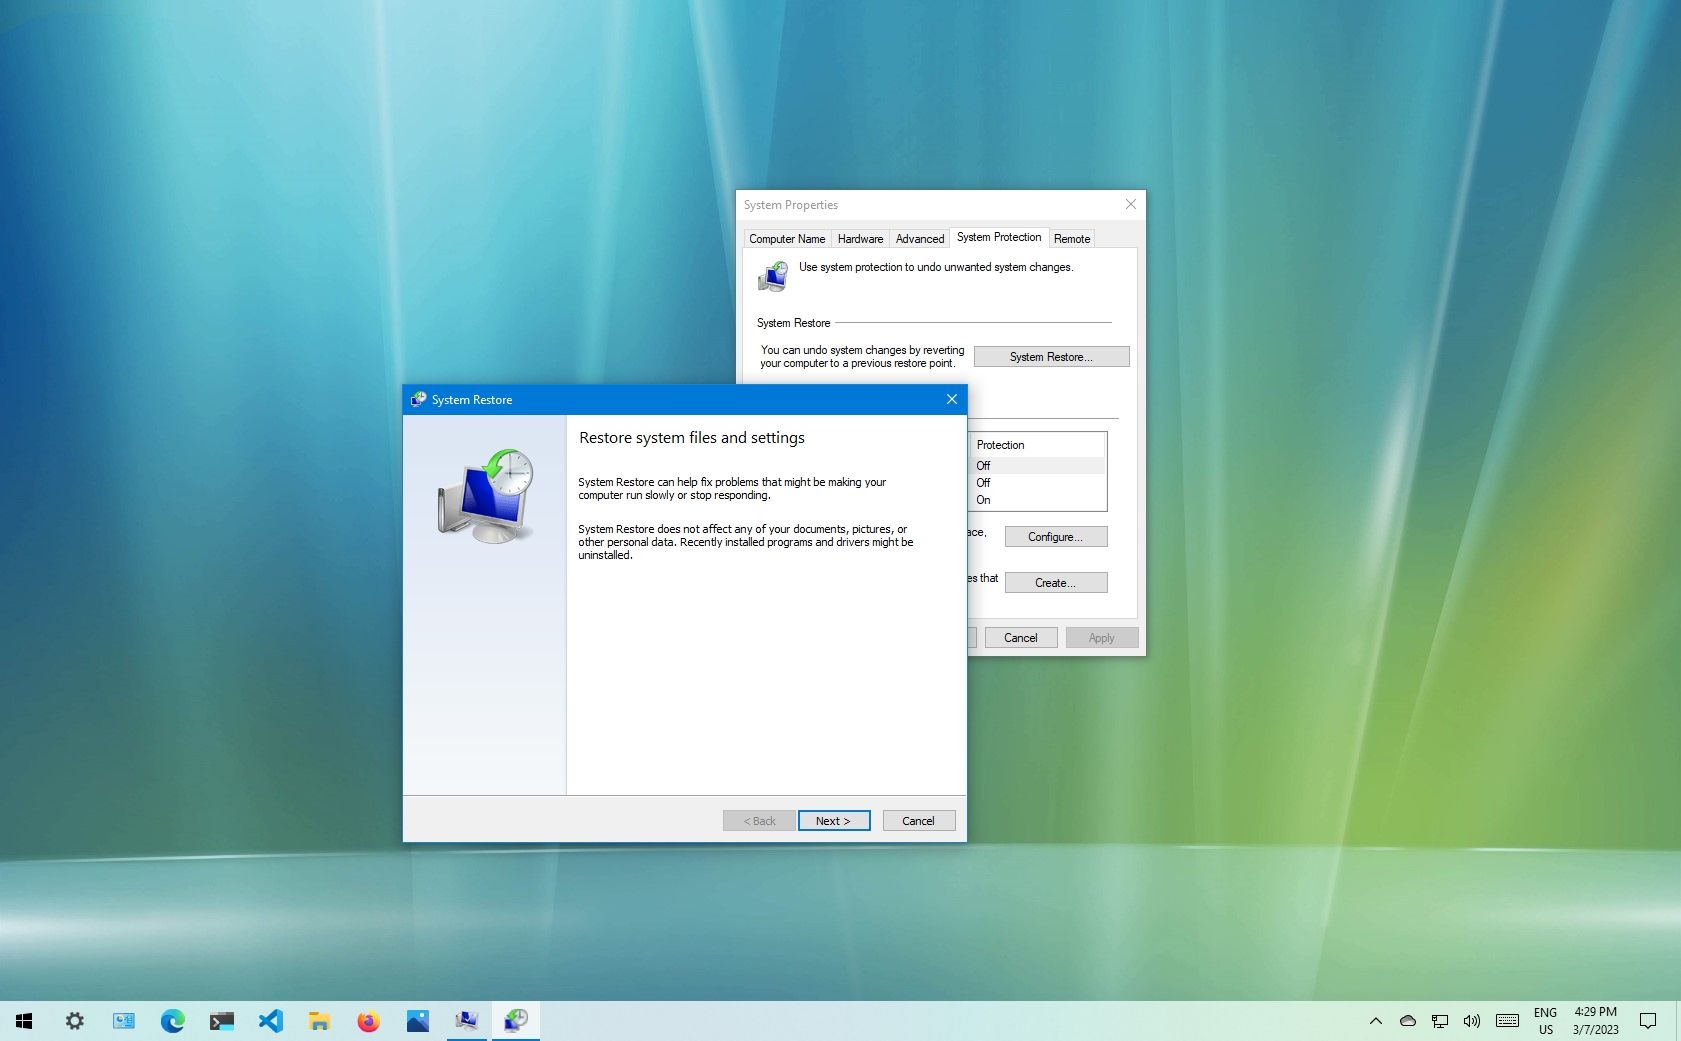
Method A: Through System Properties (Most Common)
- Open Control Panel:
- Search: Click the Start button or Search icon on your taskbar, type “Control Panel,” and select it.
- Run Command: Press Windows key + R, type control, and press Enter.
- Navigate to System:
- In Control Panel, set “View by:” to “Large icons” or “Small icons.”
- Click on “System.”
- Open System Protection: In the System window, click “System protection” in the left-hand pane. This will open the System Properties dialog with the “System Protection” tab active.
Method B: Through Windows Search
- Search: Click the Start button or Search icon on your taskbar.
- Type “Create a restore point”: Type “create a restore point” into the search bar.
- Select Option: Select “Create a restore point” from the search results. This will also directly open the System Properties dialog with the “System Protection” tab.
Step 2: Check System Protection Status
Before you can use System Restore, you need to ensure it’s enabled for your system drive (usually C:).
- Verify Protection: In the “System Protection” tab of the System Properties dialog, look under the “Protection Settings” section.
- Enable if Disabled:
- If “Protection” is listed as “Off” for your system drive (C:), select the drive.
- Click the “Configure…” button.
- Select “Turn on system protection.”
- Adjust the “Max Usage” slider to allocate enough disk space for restore points (5-10% is usually sufficient for most users).
- Click “Apply” then “OK.”
Step 3: Start the System Restore Process
Once System Protection is enabled (or confirmed to be enabled), you can begin the restore.
- Click System Restore Button: In the “System Protection” tab, click the “System Restore…” button.
- Welcome Screen: The “System Restore” wizard will open. Click “Next.”
Step 4: Choose a Restore Point
This is the most critical step, as you select the point in time you want to revert to.
- Recommended Restore Point: The wizard might recommend the “recommended restore point” if one was recently created. This is often the best choice if your issue started very recently.
- Choose a Different Restore Point: To see all available restore points, select the “Choose a different restore point” option and click “Next.”
- Select from List: You will see a list of available restore points, along with their date, time, description (e.g., “Windows Update,” “Installed [Program Name]”), and type (e.g., “Automatic,” “Manual”).
- Look for a date: Select a restore point from before you started experiencing the issue.
- Scan for affected programs (Optional but Recommended): Select a restore point, then click “Scan for affected programs.” This will show you which programs and drivers will be removed (uninstalled) and which might be restored (reinstalled) if you proceed with that specific restore point. This helps you understand the impact.
- Click Next: Once you’ve selected the appropriate restore point, click “Next.”
Step 5: Confirm and Initiate Restore
- Confirm Restore Point: Review the selected restore point to ensure it’s the correct one.
- Click Finish: Click “Finish” to start the process.
- Warning: You will receive a warning that “System Restore cannot be undone after it has begun.” Click “Yes” to confirm.
- Restart: Your computer will restart and begin the restoration process. This can take some time (from a few minutes to an hour or more), depending on the size of the restore point and your system’s speed. Do not interrupt your PC during this process.
Step 6: After the Restore
- Confirmation: After the restart and restore are complete, you will see a message indicating whether System Restore was successful.
- Check for Resolution: Verify if the issue you were trying to fix has been resolved.
- Reinstall Programs (If Necessary): If the scan showed that programs were removed, you may need to reinstall them. Your personal files remain untouched.
What if Windows Won’t Start? (Accessing System Restore from Advanced Startup)
If your Windows PC is so unstable it won’t boot normally, you can access System Restore from the Windows Recovery Environment (WinRE).
Method A: Automatic Repair Screen
- Repeated Failed Boots: Windows will usually automatically enter WinRE after a couple of failed boot attempts.
- “Automatic Repair” Screen: On the “Automatic Repair” screen, click “Advanced options.”
Method B: Boot from Installation Media
If automatic repair doesn’t appear, you might need to boot from a Windows installation USB drive or DVD.
- Create Installation Media: On a working PC, download the Windows Media Creation Tool from Microsoft’s website and create a bootable USB drive.
- Boot from Media: Insert the USB drive into the problematic PC and restart it. You may need to press a key (often F2, F12, Del, or Esc) during startup to enter your BIOS/UEFI settings and set the PC to boot from the USB drive.
- Language and Keyboard: At the Windows Setup screen, select your language and keyboard layout, then click “Next.”
- Repair Your Computer: Instead of clicking “Install now,” click “Repair your computer” in the bottom left.
Accessing System Restore from WinRE/Advanced Options
Once you’re in WinRE (either via Automatic Repair or installation media):
- Choose an Option: Click “Troubleshoot.”
- Advanced Options: Click “Advanced options.”
- Select System Restore: Click “System Restore.”
- Select User Account: Choose your user account and enter your password if prompted.
- Proceed with Restore: The System Restore wizard will open, similar to Step 4 above. Follow the prompts to select a restore point and initiate the restoration.
System Restore is a powerful recovery tool for software-related issues, offering a non-destructive way to revert problematic changes and get your Windows PC back to a stable state.
FAQ: How to Restore System Using System Restore in Windows
Q1: What does System Restore actually do? Does it delete my personal files?
System Restore reverts your Windows PC’s system files, installed programs, drivers, and registry settings to a previous state captured in a restore point. It does NOT delete or affect your personal files such as documents, photos, videos, emails, or music. It’s designed to fix software issues without data loss.
Q2: What kinds of problems can System Restore fix?
System Restore is best for fixing software-related problems, such as:
- Issues after installing a new program or app.
- Problems caused by a faulty driver installation.
- Unexpected system behavior after a Windows update (though some updates are too fundamental to be fully reversed by System Restore).
- General system instability or crashes that appeared recently. It is not a solution for hardware failures, virus infections (though it might remove some effects of malware), or personal file corruption.
Q3: How do I create a manual restore point?
To create a manual restore point:
- Search for “create a restore point” in the Windows search bar and open the result.
- In the “System Protection” tab, ensure System Protection is “On” for your main drive (C:).
- Click the “Create…” button.
- Give the restore point a descriptive name (e.g., “Before installing XYZ Software”) and click “Create.” It’s a good practice to create one before installing any major software or driver.
Q4: My computer won’t boot. Can I still use System Restore?
Yes! If your Windows PC won’t boot, you can access System Restore through the Windows Recovery Environment (WinRE). Windows will often automatically enter WinRE after a few failed boot attempts, or you can force it by turning your PC on and off three times. Once in WinRE, go to “Troubleshoot” > “Advanced options” > “System Restore.” If WinRE doesn’t appear, you may need to boot from a Windows installation USB drive.
Q5: What happens if System Restore fails or doesn’t fix my problem?
If System Restore fails (e.g., “System Restore did not complete successfully”), you can try:
- Choosing a different, older restore point.
- Running System Restore from Safe Mode or the Windows Recovery Environment.
- Running a System File Checker (sfc /scannow in Command Prompt as Administrator) to fix corrupted system files before trying restore again. If it completes but doesn’t fix the problem, it means the issue is likely not related to the system changes that System Restore reverts (e.g., hardware failure, a deep-seated malware infection, or a fundamental operating system corruption that requires more drastic measures like a “Reset this PC” or a clean Windows installation).